You’ve heard the complaint. Perhaps you’ve uttered it yourself: “Why can’t I go to one place to find out everything that’s going on around here?”
At Fenwick & West, we hold many events across numerous practice groups, departments and venues on any given day. Our challenge was to make information on all of these events readily accessible through our intranet, for the benefit of attendees as well as for those scheduling the events. Further, we wanted each practice group or department to determine what information to present for their events. For example, an event sponsored by the “Professional Development” department might indicate whether MCLE credit was offered; a Tax Practice Group event might include links to relevant government tax code pages.
In practice, we wanted each type of entry to have its own data entry and display form. Finally, we wanted both schedulers and attendees to be able to find upcoming events either through our intranet or Microsoft Outlook.
We were pleased to discover how much could be achieved through SharePoint (either Microsoft Office SharePoint Server or Windows SharePoint Services) using the out-of-the-box event list and a few no-code techniques. In this article I’ll walk you through the steps we used to create our consolidated calendar. I’ll do so using a simplified example, one in which there are only two event types: “Facilities Department” and “Tax Practice Group.” You can, however, easily extend this example to support any number of unique event types for your firm.
Before you get started, you’ll need sufficient privileges to create the necessary components in your SharePoint implementation. Specifically, you’ll need to have “Site Collection Administrator” privileges, or the assistance of someone who does, so that you can create a few content types (more on this later), as well as the calendar list to contain your event entries. Here are the steps.
CREATING A CONSOLIDATED CALENDAR, STEP-BY-STEP
1. Identify the practice groups, departments or other types of events you want to include in the master calendar (e.g. “Corporate Practice Group,” “Litigation Practice Group,” “Training Department,” “Facilities Department,” etc.)
2. Create a new list based on the “Calendar” type. There are two important reasons for starting with a “Calendar” list type. First, doing so will enable the option of displaying your firmwide calendar in Microsoft Outlook. Second, it will allow you to support recurring events.
a. Navigate to the SharePoint site that will contain your consolidated calendar.
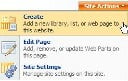
b. Choose the “Site Actions > Create” option in the upper-right corner of the page. If you don’t see this option, your account does not have sufficient privileges to create new objects in the selected site.
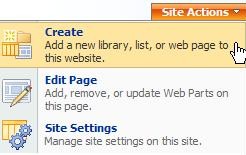
Figure 1. Site Actions. Click image to enlarge.
c. Choose the “Calendar” list type.
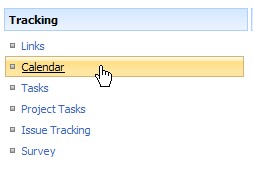
Figure 2. Calendar list type. Click image to enlarge.
d. Provide a name for the new calendar.
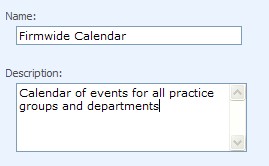
Figure 3. Naming the calendar. Click image to enlarge.
3. Create a custom content type for each event type you defined in step 1 above, but DO NOT add “start time”, “end time” or “description” fields — those will be added later.
If you have created any type of list in SharePoint before, steps 1-2 will be familiar. But step 3 might need some explanation. In earlier versions of SharePoint each list could have one and only one type of data associated with it. If the list was a document library, only documents could be placed in that list, if a contact list, only contacts, etc. SharePoint 2007 removes this limitation through the use of “content types.” A content type is simply a collection of fields and behaviors that represent a single entry in a list, and lists can now hold items of more than one content type. When you created the “Firmwide Calendar” list in step 2, a list with a single “Event” content type was created. In this step you’ll create two more custom content types that we’ll add to that list in steps 4-5.
a. Choose the “Site Actions > Site Settings” menu option in the upper-right corner of any site page.
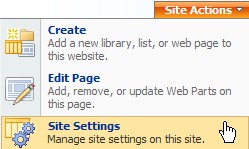
Figure 4. Site Actions > Site Settings. Click image to enlarge.
b. Choose the “Site content types” option from the “Galleries” menu, then click on the “Create” option.
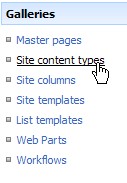
Figure 5. Site content types. Click image to enlarge.
c. Create a new content type for “Tax Practice Group Events” as shown in the following figure, then click the “OK” button to save.
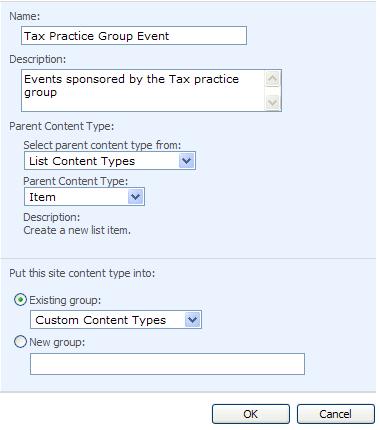
Figure 6. Create a new content type. Click image to enlarge.
d. Add “Jurisdiction” and “Relevant Tax Code(s)” columns as shown.

Figure 7. Add columns. Click image to enlarge.
e. Repeat steps 3.a-d to add a “Facilities Department Event” content type with fields “Facilities Contact” (Person or group type), and “Reason for Maintenance” (Multiple lines of text type).

Figure 8. Add columns for other content types. Click image to enlarge.
4. Enable multiple content types in your “Firmwide Calendar” list. To do so navigate to the “Firmwide Calendar” list you created in step 2, and on the “List Settings > Advanced Settings” page, set the “Allow management of content types?” option to Yes.
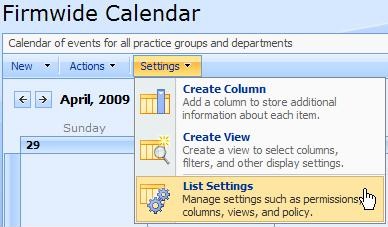
Figure 9. Firmwide Calendar — List Settings. Click image to enlarge.
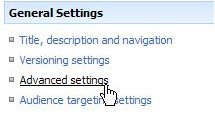
Figure 10. Firmwide Calendar — List Settings — Advanced Settings. Click image to enlarge.

Figure 11. Advanced Settings. Click image to enlarge.
5. Add your custom content types. On the “List Settings” page click on the “Add from existing site content types” link, then select the new content types you created in step 3, click the “Add” button, and finally click “OK” to save your selection.
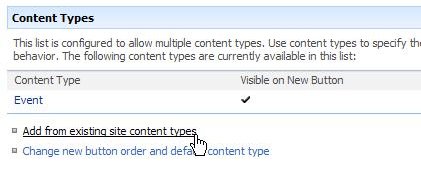
Figure 12. List Settings — Content Types. Click image to enlarge.
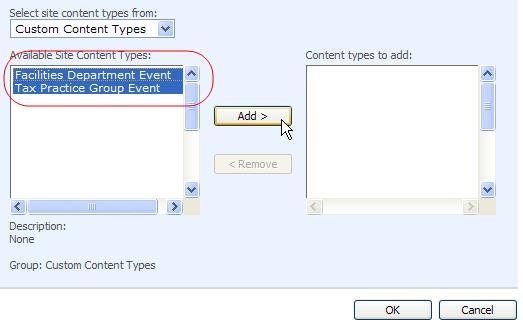
Figure 13. Add from existing site content types. Click image to enlarge.
6. Change the name of the original “Event” content type to “Recurring Event” by clicking on the “Event” link in the content types section of the list settings page, clicking on the “Name and description” link, changing the name to “Recurring Event,” and finally clicking on the “OK” button to save your change.

Figure 14. Change the name of the original “Event.” Click image to enlarge.
7. Add the common event fields to your custom content types. To do so click on the name of each custom content type in the “Content Types” list, next click on the “Add from existing site or list columns” link, finally add the “Start Time,” “End Time,” “Location” and “Description” columns — these columns were defined in the base “Event” content type.

Figure 15. Add common event fields. Click image to enlarge.

Figure 16. Add common event fields. Click image to enlarge.
8. Add two calculated columns to the list.
These calculated columns are not required, but will improve the display of items on the calendar.

Figure 17. Add calculating columns. Click image to enlarge.
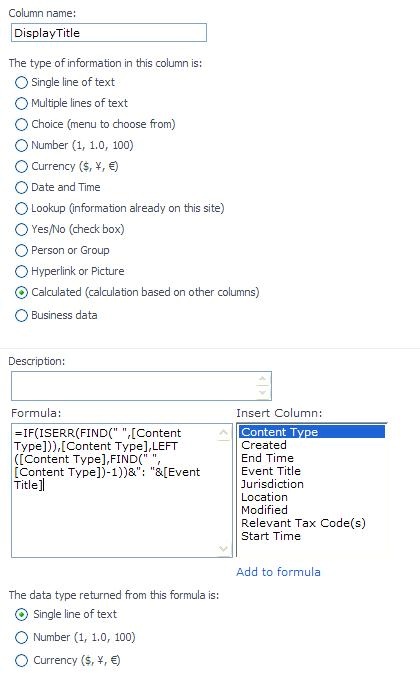
Figure 18. Add calculating columns. Click image to enlarge.
a. “DisplayTitle” will display just the first word of the content type name followed by the title of the event, using the following formula
=IF(ISERR(FIND(” “ ,[Content Type])),[Content Type],LEFT([Content Type],FIND(” “ ,[Content Type])-1))&”: “&[Event Title] , and “Event Category” will display just the first word of the content type, using the formula =IF(ISERR(FIND(” “ ,[Content Type])),[Content Type],LEFT([Content Type],FIND(” “ ,[Content Type])-1))
b. “Event Category” will display just the first word of the content type, using the formula: